


Building your own smart gadget is much easier than you might think. You can easily learn how to make an IoT device by choosing a budget-friendly microcontroller, attaching simple sensors, and writing code to connect it to the internet. This step-by-step guide walks you through the entire creative process from a blank page to a working cloud connection.
Imagine waking up on a cold winter morning. You do not want to leave your warm bed yet. With a quick tap on your phone, you turn on the heater in your living room. A few minutes later, you walk into a warm, cozy space. This is not science fiction. This is the power of the Internet of Things, or IoT. These smart devices connect our physical world to the web. They make our daily lives much easier and more fun.
Many people think that creating smart tech is only for giant tech firms. But you do not need a degree in engineering to start. Anyone with a little curiosity can learn how to build their own smart tools. If you have ever wanted to make a smart home gadget, you are in the right place.
In this guide, we will explore how to make an IoT device from scratch. We will break down the hardware you need. We will look at the code that brings it to life. Finally, we will show you how to connect your new creation to the internet. Let us dive in and build something amazing together.
Key Takeaways
- Start with a Plan: Clearly define what problem your device will solve before buying parts.
- Choose the Right Hardware: Microcontrollers like the ESP32 are cheap, powerful, and easy to use.
- Write Clean Firmware: Code your device to read sensor data and manage power use efficiently.
- Pick a Connectivity Method: Use Wi-Fi for indoor projects and cellular or Bluetooth for outdoor setups.
- Design a Secure Cloud Connection: Safely send, store, and view your device data in the cloud.
- Prototype on a Breadboard: Always test your temporary connections before making a permanent circuit board.
📑 Table of Contents
Planning Your IoT Project
Before you buy any parts, you must make a plan. A good plan saves you time and money. It keeps you focused on your goal. If you skip this step, you might end up with parts that do not work together.
Define the Problem
Every good device solves a real problem. Ask yourself what you want your device to do. Do you want to water your plants when the soil gets dry? Do you want to track your dog? Keep your goal simple for your first project. A simple goal is easy to build and test. You can always add more features later.
Map Out the Data Flow
Once you have a goal, trace the path of your data. How will your device gather facts? It might use a small sensor to read the air temperature. Where does that data go next? The brain of your device must process it. Then, the device must send that data to the web. Finally, you must see that data on your phone or computer. Mapping this path helps you see every part you need to build.
Choosing Your IoT Hardware
Now comes the fun part. You get to choose the physical parts for your build. The hardware is the body of your device. It includes the brains, the senses, and the power source.
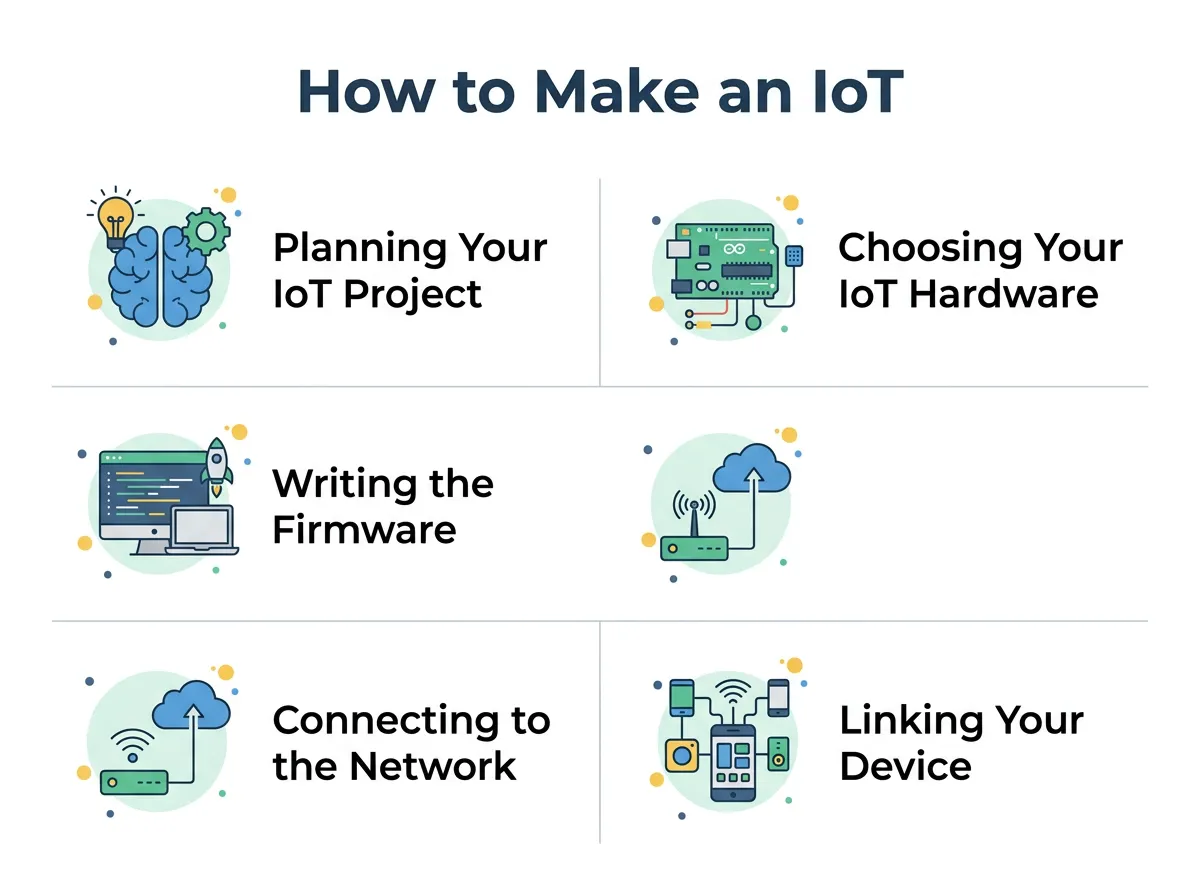
How to Make an IoT Device? — key points at a glance
Selecting the Brains
The main brain of your device is a small chip. You can use a microcontroller or a single-board computer. A microcontroller is cheap and uses very little power. The ESP32 is a great choice. It has built-in Wi-Fi and Bluetooth. Another choice is the Raspberry Pi. This is a tiny computer that can run a full operating system. For most basic projects, a simple microcontroller is best because it is cheap and easy to program.
If you want to design custom hardware, you can read about designing custom IoT hardware to understand how professional teams build boards from scratch.
Sensors and Actuators
Sensors are the eyes and ears of your device. They read the world around them. You can buy sensors for temperature, light, motion, or moisture. Actuators are the hands of your device. They do physical work. Examples include small motors, lights, or buzzers. If your sensor detects dry soil, your actuator can turn on a water pump. Choose simple sensors that have lots of online guides.
Writing the Firmware
Firmware is the code that runs directly on your hardware. It tells your device how to behave. It tells the brain when to read the sensors and when to send data.
Setting Up Your IDE
An Integrated Development Environment, or IDE, is where you write your code. The Arduino IDE is the most popular tool for beginners. It is free and works with many boards. You write code on your computer. Then, you plug your board into your computer with a USB cable. With one click, you load the code onto the chip.
For a step-by-step setup, you can check out this guide on building a simple IoT device with easy software tools.
Reading Sensor Data
Your code will run in a loop. First, it asks the sensor for a reading. For example, it might ask, “How hot is the room?” The sensor sends back a number, like 72. Your code takes that number and saves it. Next, you must write code to send that number over the internet. Keep your code simple. Use lots of comments to explain what each line does. This helps when you need to fix bugs later.
Connecting to the Network
An IoT device is not smart until it connects to a network. You must choose how your device will talk to the world.
Wi-Fi, Bluetooth, and Cellular
Your choice depends on where your device will live. If it stays inside your home, Wi-Fi is the best choice. It is fast and free to use. If your device needs to talk to your phone nearby, Bluetooth is great. If your device is outside in a field, you might need cellular data. Cellular options use more power and cost money, but they work almost anywhere.
To learn more about these pathways, read this detailed post on building an IoT device with different connection methods.
IoT Protocols
Devices do not send data the same way humans do. They use special rules called protocols. The two most common rules are HTTP and MQTT. HTTP is what your web browser uses. It is good for sending large packets of data. MQTT is much lighter. It is designed for small devices that need to send quick, simple updates. MQTT is perfect for saving battery life and keeping network costs low.
Linking Your Device to the Cloud
Once your device sends data, it needs a place to go. The cloud acts as a giant hard drive and brain in the sky. It receives your data, saves it, and lets you interact with it.
Cloud Platforms
You do not have to build your own cloud. There are many free platforms ready for you. Adafruit IO, Blynk, and AWS IoT are great options. These platforms give you a unique key. You put this key in your device code. When your device sends data, the cloud knows it belongs to you.
Data Visualization and Control
Once your data is in the cloud, you can build a dashboard. A dashboard is a web page with charts, dials, and buttons. You can watch your room temperature change in real time. You can also add a button to your dashboard. When you click it, the cloud sends a signal back to your device to turn on a light. This turns your device into a two-way communication system.
Building a Physical Prototype
It is time to bring everything together. You have your plan, your parts, your code, and your cloud. Now you must build the physical prototype.
Using a Breadboard
Do not glue or solder your parts yet. Use a breadboard first. A breadboard is a plastic board with holes. You can push wires and chips into the holes to connect them. This lets you test your circuit easily. If a wire is in the wrong place, you just pull it out and move it. Test every sensor one by one. Make sure your device can connect to your home Wi-Fi before you make it permanent.
Moving to a Permanent Build
Once your prototype works, you can make it robust. You can solder the wires to a perfboard. This keeps the connections solid. You can also design a custom case. A 3D printer is a great tool for making custom plastic boxes. A good case protects your device from dust, moisture, and drops. Now, your device is ready to work 24/7 in the real world.
Conclusion
Learning how to make an IoT device is an exciting journey. It combines hands-on hardware work with creative coding. You start with a simple idea. Then, you choose your microcontroller, connect your sensors, and write your firmware. By linking your device to the cloud, you gain control from anywhere in the world. Start with a small, simple project today, and watch your ideas come to life!
Frequently Asked Questions
What is the easiest microcontroller for beginners?
The ESP32 is highly recommended for beginners. It is cheap, powerful, and has built-in Wi-Fi and Bluetooth. It also works seamlessly with the easy-to-use Arduino IDE.
Do I need to know how to code to build an IoT device?
Basic coding knowledge helps, but you do not need to be an expert. There are many pre-made code templates online for common sensors. You can easily copy, paste, and modify these templates for your project.
How do IoT devices power themselves?
Most desktop prototypes use a USB cable plugged into a computer or wall outlet. Portable devices use rechargeable lithium batteries or AA batteries. Some outdoor devices even use small solar panels to recharge.
What is the difference between HTTP and MQTT?
HTTP is a heavier protocol used for standard web browsing and larger data files. MQTT is a lightweight protocol designed specifically for small smart devices. MQTT uses very little data and saves battery life.
Is it expensive to build a custom smart device?
No, building a basic device is very affordable. A microcontroller like the ESP32 costs less than ten dollars. Basic sensors usually cost between two and five dollars each.
How do I keep my IoT device secure?
You can protect your device by changing all default passwords. Always use encrypted connections like HTTPS or MQTTS when sending data. It is also wise to keep your device firmware updated to fix security issues.
